by Maria Pericozzi | Jun 8, 2023
Kitchen Safety Tips: Use gloves when marinating meats.
EVOO- Extra Virgin Olive Oil
TBL – tablespoon
TSP- teaspoon
Step 1: Place Ingredients
In a bowl, place all ingredients and mix
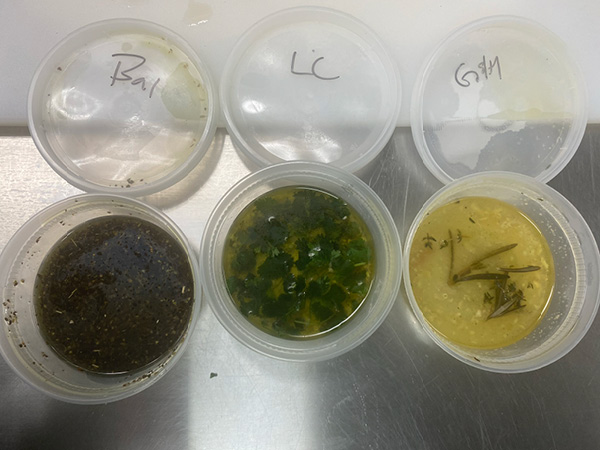
Step 2: Balsamic
3 TBL Balsamic Vinegar
3 TBL EVOO
1 tsp oregano
1 tsp basil
Pinch s and p
Step 3: Lime Cilantro
½ lime or 1 TBL lime juice
¼ cup EVOO
¼ cup chopped cilantro
1 TBL minced Garlic
Pinch s and p
Step 4: Garlic and Herb
1/8 cup EVOO
¼ cup White Vinegar
1 TBL Garlic powder
1 spring rosemary
1 spring thyme
Fresh parsley and pinch s and p
Step 5: Add to Meat
In a ziplock bag, place thawed meat of your choices such as, Chicken, steak or seafood in the bag. Add marinade and zip up bag. Mix around and let soak 3 hours up to 2 days
Step 6: Cook and Enjoy
Bake, Sautee, or grill!
*Note, if grilling be careful of flame from oil/vinegar.
by Maria Pericozzi | Jun 8, 2023
Kitchen Safety Tips: Always make sure nothing is in the oven before turning on. Remember to use an oven mitt and turn off when done. Let others know there is a hot surface
To make Cannoli’s as well, use the QR code (both recipes)
Step 1: Preheat the Oven
Check to make sure nothing is in oven
Preheat the oven to 350 degrees
Step 2: Prep Pan
Spread half of the red sauce in a pan
Step 3: Mix Ingredients
Mix cheese, garlic, onion, parmesan cheese, salt and pepper and Italian seasoning together
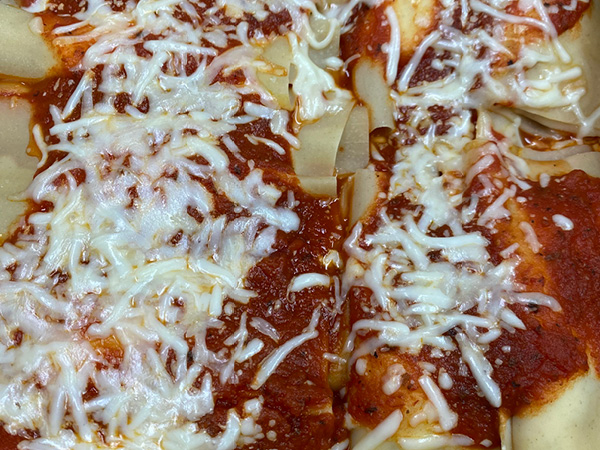
Step 4: Fill
Use spoon to place cheese mixture onto fresh pasta sheet. If using larger sheets, cut in half! Spread and roll. Add to sauced pan
Step 5: Sauce and Top
Add sauce and cheese on top and using an oven mitt, place in oven 22-25 minutes.
Step 6: Serve
Again, using an oven mitt, pull pan from the oven, turn off oven, serve and enjoy!

by Maria Pericozzi | Jun 8, 2023
Kitchen Safety Tips:
Always use oven mitts
Always let oil cool before throwing away
Never drop food into oil from above, go low to place in & not splash
Step 1: Pre-heat Oil
Heat oil in pan to about 320 degrees or until flour bubbles if you sprinkle in
Step 2: mac and cheese
Scoop mac and cheese (whatever kind you have) into 1 ½ inch balls
Step 3: mix
Mix salt and pepper into flour using a whisk
Crack eggs and whisk with a little bit of water
Step 4: Bread
Take mac and cheese balls, roll in flour, dip in egg, roll in bread crumbs. Do this for each ball.
Step 5: Fry
Place breaded ball into the hot oil and fry until brown on all sides.
Pull and rotate with tongs
Step 6: Cool
Place fried mac and cheese onto baking sheet with parchment or paper towels to drain oil and cool
ENJOY!!

by Maria Pericozzi | Jun 8, 2023
Kitchen Safety Tips:
Make sure to use pot holders when handling pots on the stove, or pans in the oven.
Notify anyone else in the kitchen that the stove and oven will be on, to prevent anyone from burning themselves.
Step 1: Cook Pasta
Add broth and water to pot and bring to a boil.
Add pasta and cook for 6 minutes.
Strain noodles and run under cold water.
Step 2: Start your Roux
Melt butter in a separate pot and whisk in flour to create your roux.
The roux will help to thicken our cheese sauce.
Preheat oven to 350°
Step 3: Cheese Sauce
Add milk, seasonings, cheese, and egg into the pot and whisk.
Continue to cook on a medium heat, whisking frequently, until everything is melted and combined.
Step 4: Combine
Add cooked pasta and finished cheese sauce to large mixing bowl and stir to combine.
Pour the mixture into your baking pan and spread it evenly. You are done!
Step 5: OPTIONAL BAKING
If you have an oven available, sprinkle the ½ cup of each cheese for garnish on top of the mac and cheese.
Sprinkle paprika, pepper, and parsley on top of that to your liking.
Step 6: Bake and Enjoy!
Cover baking pan with aluminum foil and bake at 350° for 25 minutes.
Remove foil and continue to bake at 350° for an additional 10 minutes.
Let cool and enjoy!

by Maria Pericozzi | Jun 8, 2023
Kitchen Safety Tips:
Always use an oven mitt!
Let anyone in your home know you will be using the oven.
Step 1: Bacon
Air Fry bacon at 375° for about 8 minutes or until desired crispiness
OR
Bake bacon at 350° on a parchment lined baking sheet for about 15 minutes or until desired crispiness.
Step 2: Prep
Prep your cutting station with a damp cloth and cutting board.
Chop green onions.
Chop cooked bacon.
Preheat oven to 400°
Step 3: Potatoes
Using the colander, run the potatoes under cold water and scrub with a brush or cloth.
Either boil potatoes until tender OR poke potatoes with a fork, drizzle with olive oil, and bake at 400° for about 40-60 minutes until tender.
Step 4: Potatoes Cont.
Once potatoes are tender, carefully cut in half lengthwise with a knife and let cool.
Using a spoon/scoop/melon baller, scoop the insides of the potato out, just enough to have room for your toppings.
Step 5: Toppings
Put potatoes on the parchment lined baking sheet.
Sprinkle with shredded cheddar cheese, chopped bacon, and green onions. Put in oven for about 5-10 minutes, or until the cheese has melted.
Step 6: Enjoy!
Remove potatoes from oven, let cool. Serve with sour cream and Enjoy!
These can be stored in an airtight container for about 3 days. You can easily reheat them in the air fryer at 375° for about 5 minutes.
by Maria Pericozzi | Jun 8, 2023
Kitchen Safety Tips: Always pour hot water away from face.
Always use a pot holder!
TBL – tablespoon
TSP- teaspoon
Step 1: Cut and Clean
Cut potatoes into even size pieces, rinse and place in large pot.
Step 2: Fill and Boil
Fill pot ¾ with water, put on stove and bring to a boil.
Step 3: Drain and Melt
After 30 minutes, when potatoes are cooked and tender, not over cooked, drain into strainer pouring hot water away from you and using pot holders. Rinse potatoes with cold water for 2 minutes and drain, put back into pot and smash (not mash) with butter.
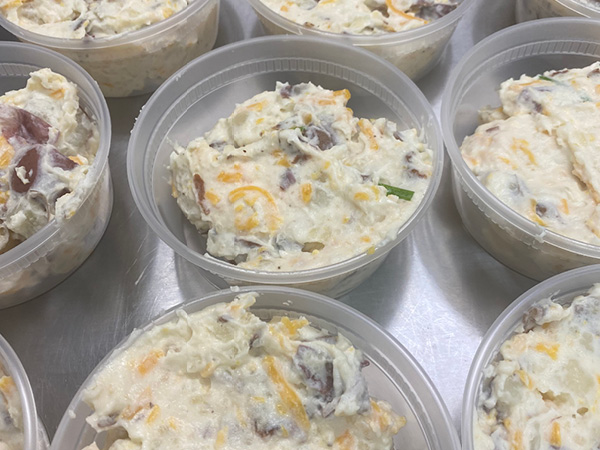
Step 4: Add Sour Cream
Mix in sour cream until coated and a pinch of salt and pepper to taste.
Step 5: Add the rest
Add bacon, cheddar and chives, mix until everything is together.
Step 6: Enjoy
Can be served warm or cold, ENJOY!!! Make sure not to leave out and should be kept in fridge or on ice if served cold

by Maria Pericozzi | Jun 8, 2023
Kitchen Safety Tips:
Let anyone around you know that you will be using the stove.
Always use a pot holder!
Step 1: Simple Syrup
Add water and sugar to small pot. Whisk to combine and bring to a boil. Continue to whisk periodically.
Once boiling, remove from heat and allow to fully cool.
Step 2: Zest
Zest your lemon. Be very careful when using a zester, ask for help if you need it.
Don’t throw away that lemon! Don’t be wasteful, find another use for the inside.
Step 3: Mix
Once simple syrup has cooled, add zest to mixture and stir.
Step 4: Juice
Add lemon juice to the mixture and stir to combine.
Transfer mixture to a freezer safe container.
Step 5: Freeze
Freeze for at least 8 hours to fully achieve the right consistency.
Step 6: Enjoy!
Grab sorbet out of the freezer, add to a bowl or cone and add your favorite toppings!
Suggestions: fresh fruit, honey, agave, granola, etc.
Enjoy!!
by Maria Pericozzi | Jun 8, 2023
Kitchen Safety Tips:
Make sure to use pot holder when touching pots on the stove.
Turn the stove off as soon as you are done using it.
Step 1: Prep
Prep your cutting station by laying a damp cloth down and placing your cutting board on top.
Chop celery and onion. Shred carrots using a cheese grater or food processor.
Step 2: Sauté
Add olive oil to pot over medium heat. Add carrots, celery, onion, and garlic to the pot and sauté until tender.
As your veggies are cooking, add in bay leaves and dill.
Step 3: Chicken
Once veggies are tender add chicken stock.
Stir to combine.
Add chicken, stir to combine.
Step 4: Lemon
Add lemon juice to pot.
Zest one lemon and add zest to the pot.
Stir to combine.
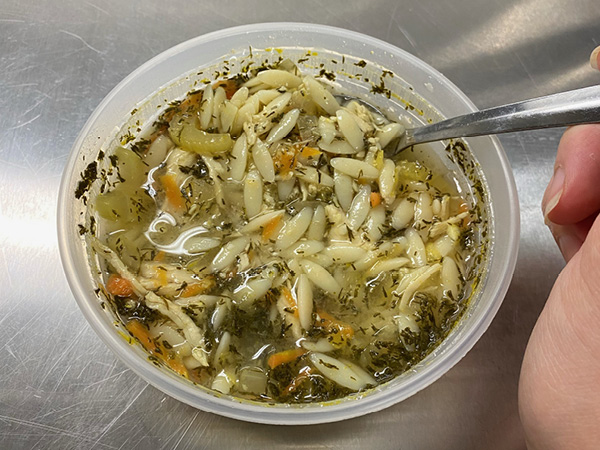
Step 5: Pasta & Simmer
Add pasta to pot. Stir to combine.
Leave on a medium high heat for about 10 minutes in order to cook the pasta.
Step 6: Finish & Enjoy!
Once your soup has heated up and pasta is cooked, turn off.
Let cool and serve. Enjoy!

by Maria Pericozzi | Jun 8, 2023
Kitchen Safety Tips:
Make sure to assemble your mixer before you plug it in!
Step 1: Slushy Mix
Combine all slushy ingredients to a mixing bowl and use a whisk to combine.
Step 2: Freeze
Get your ice cream machine and set it up. Add slushy mix and run for 20 minutes or until it reaches a slushy consistency.
Step 3: Whipped Cream
Add all whipped cream ingredients to a mixing bowl or bowl of a stand mixer. Use the whisk attachment to mix until soft peaks form.
Refrigerate until ready to use.
Step 4: Assemble
Scoop desired amount of slushy mix into a cup and top with the tropical whipped cream.
Step 5: Enjoy
Enjoy!
I highly recommend enjoying with either a straw or a spoon.
Step 6: Storage
Extra whipped cream can be stored in an airtight container in the refrigerator.
Extra slushy can be stored in the freezer in an airtight container. When used again, add to a blender with a bit of water or juice to return to a slushy consistency.
by Maria Pericozzi | Jun 8, 2023
Kitchen Safety Tips:
Always use pot holders.
Notify anyone in the kitchen that you will be using the stove.
Check inside the oven before preheating.
Step 1: Preheat and Prep
Preheat your oven to 375°
Spray your baking dish with nonstick cooking spray.
Step 2: Ground Turkey
Heat your frying pan over medium high heat. Add your ground turkey and cook until meat is fully cooked through. Turn off stove.
One your meat is cooked, stir in the marinara sauce to create a meat sauce.
Step 3: Assemble
Start by spreading 1/3 of your meat sauce to the bottom of the baking dish.
Top with 3 uncooked noodles.
Spread ½ of the ricotta onto the noodles. Top with ½ of the mozzarella and ½ of the parmesan.
Step 4: Assemble
Add 1/3 of the sauce to the top of the cheeses.
Add 3 more uncooked noodles.
Spread the rest of the ricotta onto the noodles. Pour remaining sauce on top. Top with the remaining mozzarella and parmesan.
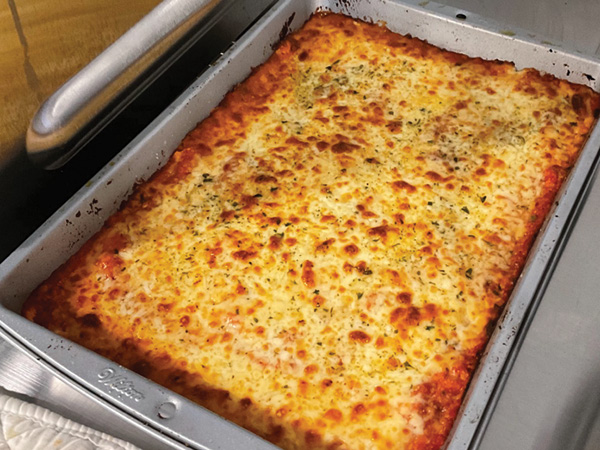
Step 5: Bake
Spray aluminum foil with nonstick cooking spray. We don’t want the foil to stick to that yummy cheese!
Cover baking dish tightly with the aluminum foil.
Bake at 375° for 40 minutes.
Step 6: Finish and Enjoy!
Remove the foil and continue to bake for another 10 minutes.
Garnish with parsley.
Let cool for at least 5 minutes before serving.
Enjoy!!