by Maria Pericozzi | May 31, 2023
Kitchen Safety Tips:
Be careful when you drop any food into hot oil. It could splash and burn you.
Step 1: Cure Chicken
Place raw chicken wings in a mixing bowl and sprinkle with salt. Stir to coat. Cover and place in fridge for at least 30 minutes.
Choose either Air Fry or
Deep Fry as your step #2
Step 2: Deep Fry option
Set deep fryer to 325°.
Deep Fry at 325° for 5 minutes.
Remove from oil. Place on paper towels or a cooling rack to let excess oil drip.
Set deep fryer to 375°
Step 2a: Second Fry
Fry again at 375° for about 3 minutes or until the skin is more golden brown and crispy.
Remove from fryer, place on paper towels or a cooling rack to let excess oil drip.
Step 2: Air Fry option
Air Fry at 375° for about 20 minutes. Flip food/shake basket halfway through.
Chicken should be cooked to an internal temperature of 165°
Use tongs to safely remove from air fryer.
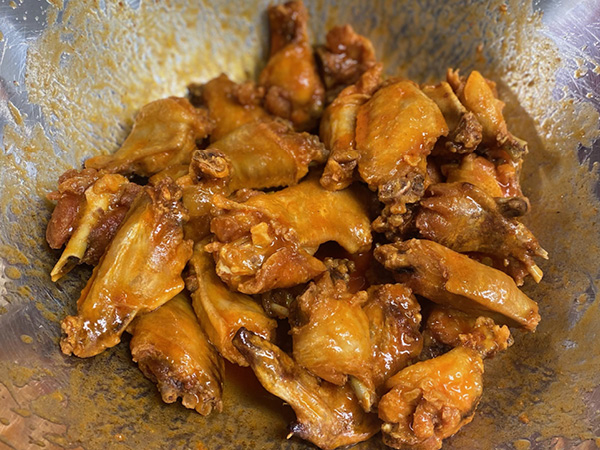
Step 3: Sauces
Whisk together melted butter and hot sauce. Pour over cooked wings in a mixing bowl and toss to coat.
Blue Cheese: Add all ingredients to a mixing bowl and stir to combine.
Step 4: Finish and Enjoy
Plate the wings, add some homemade blue cheese, or your favorite dipping sauces and enjoy!
Extras can be stored in airtight container in the fridge for 4 days.

by Maria Pericozzi | May 31, 2023
Kitchen Safety Tips:
Make sure to use pot holders when handling pots on the stove, or pans in the oven.
Notify anyone else in the kitchen that the stove and oven will be on, to prevent anyone from burning themselves.
Step 1: Boil Chicken
Add chicken breasts to deep skillet, season lightly with salt and pepper, pour water or broth into the pan covering chicken completely.
Bring to a boil and let boil for 10 minutes. Internal temperature must be at least 165°.
Step 2: Melt
Add cream cheese and your choice of dressing to a small pot over medium/low heat.
Stir frequently to melt cream cheese.
Preheat oven to 350°
Step 3: Prep Chicken
Once your chicken is completely cooked through, remove chicken from pot and place into a mixing bowl.
Shred chicken with forks.
Add hot sauce to bowl with shredded chicken and stir to combine.
Step 4: Start Layering
Add shredded chicken and hot sauce mixture to the bottom of your baking pan and spread evenly.
Pour melted cream cheese and dressing mixture on top of chicken and spread evenly.
Step 5: Cheese
Measure each cheese and mix together in a mixing bowl.
Sprinkle cheeses on top of the cream cheese mixture.
Sprinkle onion powder, garlic powder, and parsley for garnish.
Step 6: Bake and Enjoy!
Bake dip uncovered for 30 minutes at 350° or until cheese has fully melted.
You may turn the oven to broil for a few minutes if you want the cheese to have a slight crisp on top.
Remove from oven, let cool and Enjoy!!

by Maria Pericozzi | May 31, 2023
Kitchen Safety Tips: Always open lid away from yourself or anyone else.
Cool soup, portion and freeze for a quick meal!
Use whisk with flour to mix evenly.
Step 1: Melted Butter
In a large pot, melt butter over medium high heat.
Step 2: Onion & Garlic
Add onion and cook 4-6 minutes or until soft and gold. Add garlic and cook another 2 minutes
Step 3: flour and mix
Add flour and whisk for about 2 minutes, turning flour to a golden color
Step 4: Add Stock & Brocc
Add stock and Broccoli florets, mix.
Add carrots, paprika and S and P. Bring to a boil and reduce to a simmer for 15 minutes
Step 5: Milk and cheese
Add Milk/cream and cheese, mix until cheese has melted and cook for about another minute. Add more salt or pepper if needed
Step 6: Enjoy!
Let cool a few minutes and Enjoy!!
Serve with bread

by Maria Pericozzi | May 31, 2023
Kitchen Safety Tips:
Always use an oven mitt!
Preheat oven to 400°
Line muffin tin with liners or spray the tin with nonstick cooking spray. Set aside.
Step 2: Dry Ingredients
Add all dry ingredients to a mixing bowl and whisk to combine.
Step 3: Wet Ingredients
Add wet ingredients to the bowl, minus blueberries.
Stir with spatula to combine.
Step 4: Portion
Wash blueberries and fold into batter.
Use scoop and evenly distribute batter in the muffin tin.
Step 5: Bake
Bake at 400° for about 25 minutes.
Remove from oven and let cool.
Step 6: Bake & Enjoy!
Once completely cooled, enjoy!!
Muffins can be stored in an airtight container for 3-5 days.
Breakfast, Dessert, Muffin, Blueberry, blueberry muffin, gluten free, vegan, vegetarian, dairy free

by Maria Pericozzi | May 31, 2023
Kitchen Safety Tips:
Make sure to use an oven mitt when handling pans in the oven.
Step 1: Preheat & Dry
Preheat oven to 375°
Measure and add to bowl: flour, baking powder, salt, and sugar.
Whisk to combine.
Step 2: Heavy Cream
Measure heavy cream and add about 1 cup of it to the dry ingredients. Use forks to mix.
Add the rest of the heavy cream and continue to mix with forks.
Step 3: Knead
Once dough starts to come together, begin to form dough ball with hands. Knead with hands for a few minutes.
Step 4: Roll
Sprinkle a table with flour and flour your rolling pin. Roll out dough to about ½ inch thick. Use biscuit cutters to get as many biscuits as possible.
Place on lined baking tray.
Step 5: Brush & Bake
Crack egg into bowl and whisk. Use pastry brush to brush egg wash on top of biscuits.
Bake for about 15 minutes or until golden brown.
Step 6: Enjoy!
Remove from oven, let cool, and enjoy!
Add these biscuits to your favorite stew recipe or enjoy on their own with your favorite spread. Ex: butter, honey, jelly, peanut butter, etc.
by Maria Pericozzi | May 31, 2023
Kitchen Safety Tips:
Always use an oven mitt!
Step 1: Preheat and Prep
Preheat oven to 350◦
Line baking tray with parchment paper and spray with nonstick cooking spray
Step 2: Dry Ingredients
Measure out all dry ingredients and add to mixer or bowl. Mix briefly, just until all ingredients are combined.
If using a stand mixer, use the beater attachment.
Step 3: Wet Ingredients
Add in vanilla and almond extracts and eggs. Continue to beat until all ingredients are combined and a sticky dough forms.
If adding any fillings, do so now and beat until combined.
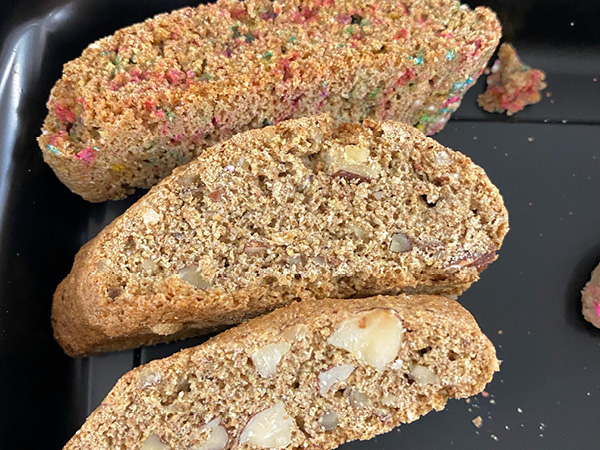
Step 4: Form Dough/ Bake
Divide dough in half. Roll each piece into a log, about 2 inches wide and the length of the baking sheet. Gently press down to flatten a bit. Make sure to space them out because they will double in size. Bake for 25 minutes.
Step 5: Cut & Second Bake
Once the first bake is done, let cool for 5-10 minutes. Cut loaves with serrated knife at desired thickness. Place flat on baking tray and return to oven to bake for another 10-15 minutes.
Step 6: Enjoy!
Remove from oven, let cool, and enjoy!!
Chef’s Tip:
This pairs great with hot beverages like coffee, tea, or hot chocolate.
Store in an airtight container
Dessert, Cookie, Biscuit, Italian, Vegetarian, Bake, oven
by Maria Pericozzi | May 31, 2023
Kitchen Safety Tips: Always open lid away from yourself or anyone else.
Cool soup , portion and freeze for a quick meal!
S and P – salt and pepper
Step 1: Oil and Beef
In a large pot, on high heat, add oil and let warm (careful not to burn)
Pat Beef and sprinkle S and P
Brown in pot, pull and place on plate. LOWER HEAT TO MEDIUM.
Step 2: Veggies and Flour
Add onions, carrots and celery to bottom of pot and cook about 5 minutes, stirring once in a while.
Add garlic and cook another minute.
Add flour and stir for a minute.
Step 3: Broth and bullion
Add broth and mix/whisk until flour is dissolved.
Add water, Worcestershire, beef/onion pack and tomato paste. Mix well
Step 4: Add Beef/Season
Add bay leaves and thyme
Put Beef back in the pot. The liquid should just cover it.
Bring to a simmer then lower heat.
Cover with lid, cook 1-2 hours
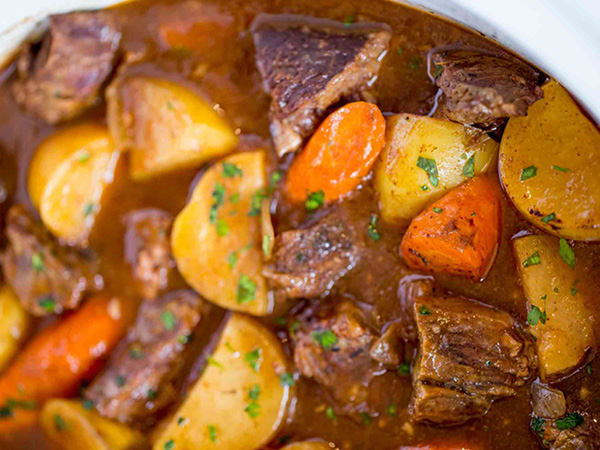
Step 5: Potatoes & Peas
Add potatoes; simmer another 25 minutes (with no lid)
Last 5 minutes, add peas
Step 6: Enjoy!
Let cool a few minutes and Enjoy!!
Soup, Lunch, Side, Beef, Beef Stew, Stew, Video
by Maria Pericozzi | May 31, 2023
Kitchen Safety Tips:
Always use a pot holder when handling pots on the stove.
Check inside the oven before you preheat it to make sure it is empty.
Always use an oven mitt when handling trays in the oven.
Step 1: Prep
Preheat oven to 425°
Add mayo, sour cream, apple cider vinegar, horseradish, and pepper to a mixing bowl. Stir to combine. Place in refrigerator.
Step 2: Roux
Add butter to medium pot over medium heat and melt. Add flour, whisk to combine.
Cook roux for about 5 minutes, whisking periodically.
Step 3: Au Jus
Add beef stock, Worcestershire, rosemary, thyme, pepper, garlic, parsley, salt and pepper. Whisk to combine. Cook on medium for about 10 minutes, then turn down the heat to low and simmer for about 10 minutes.
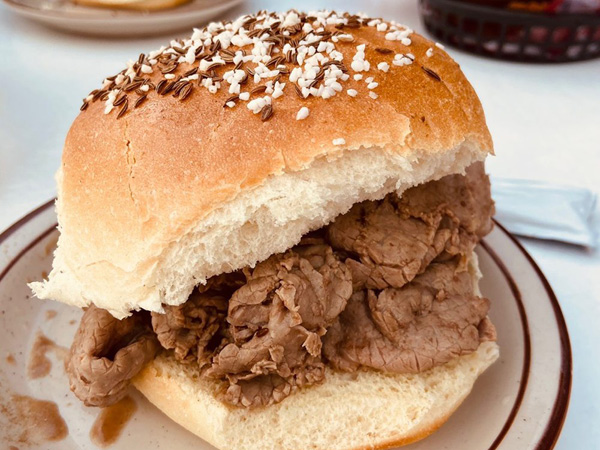
Step 4: Rolls
Brush plain rolls with melted butter and sprinkle with coarse salt and caraway seeds.
Place on parchment lined baking sheet and bake at 425° for 5 minutes. This will help everything stick, and warm the rolls.
Step 5: Assemble
Place sliced roast beef into the au jus. The meat will cook more the longer it is in the au jus. When the meat is to your liking, remove with tongs and place on the roll.
Add desired amount of horseradish mayo.
Step 6: Finish and Enjoy
Beef on Weck can be served in so many ways! A side of au jus is great for dipping, some even dip the top of the bun in the au jus before it goes on top of the sandwich. Play around and enjoy!
Extras can be stored in airtight container in the fridge for 4 days.
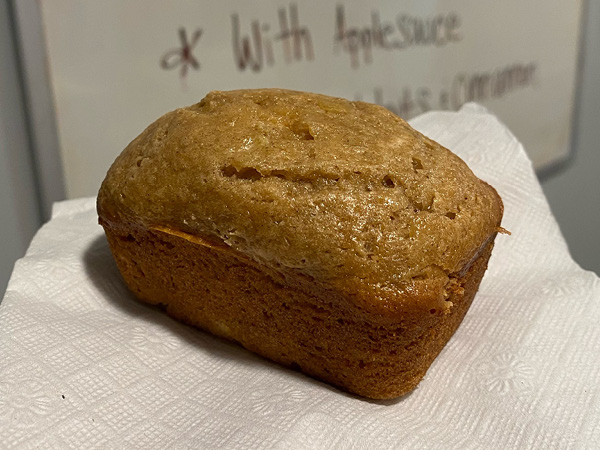
by Maria Pericozzi | May 31, 2023
Kitchen Safety Tips:
Check the oven before turning on to make sure that it is empty!
Always use an oven mitt!
Step 1: Preheat & Prep
Preheat oven to 350°
Spray pan with nonstick cooking spray.
Step 2: Dry Ingredients
Measure out flour, cinnamon, baking soda, and salt and sift into a mixing bowl.
Step 3: Wet Ingredients
Add eggs, sour cream, bananas, vanilla, and applesauce to a mixing bowl.
Whisk until combined.
Step 4: Sugars
Measure out granulated and brown sugar and add to the wet ingredient bowl.
Whisk until combined.
Step 5: Combine
Add the dry ingredients to the bowl of wet ingredients in 3 different parts. Make sure to mix completely after each addition.
Once batter is completely mixed, evenly divide into muffin tin or loaf pan.
Step 6: Bake & Enjoy!
Bake muffins for at least 20 minutes and until cooked completely.
If using a loaf pan, bake loaf for at least 45 minutes and until cooked completely.
Let cool and enjoy!!
Breakfast, Dessert, Banana, banana bread, Bread, Bake, Oven, Vegetarian, Muffin
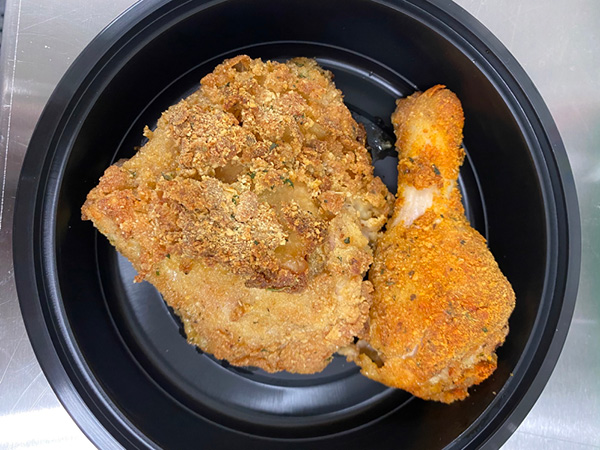
by Maria Pericozzi | May 31, 2023
Kitchen Safety Tips: Always make sure nothing is in the oven before turning on. Remember to use an oven mitt and turn off when done. Let others know there is a hot surface! Always wash hands and clean surface after cooking raw chicken!!
Key: tsp- teaspoon TBSP- tablespoon , S and P – salt and pepper
Step 1: Preheat the Oven
Check to make sure nothing is in oven
Preheat the oven to 400 degrees
Step 2: Prep Tray
Place parchment paper or foil on baking sheet
If you have the Prepped to Prepare Kit, skip to step 5
Step 3: Mix
1st bowl – add flour and a pinch of S and P, mix and put aside
2nd bowl add bread crumbs, paprika, garlic, oregano and pinch S and P put side
3rd bowl- crack 3 eggs, add water and pinch S and P, mix and put aside
Step 4: Bag
Add bread crumbs mixture to a Ziploc bag and put aside, you will shake chicken in here!
Step 5: 3 step
1- Place a piece of chicken in flour, roll
2- Place floured chicken in egg mixture
3- Place chicken (up to 3 pieces at a time) into bag and SHAKE!!!
Step 6: Cook and Serve
Place breaded chicken onto tray. Once all pieces are breaded, spray with cooking spray and cook 30 minutes, spray again and cook another 13-20 minutes.
Pull, cool and enjoy!!!!
Lunch, Dinner, Bake, Oven, Chicken, Baked Chicken, Video