by Maria Pericozzi | Jun 9, 2023
Kitchen Safety Tips:
Always use an oven mitt!
Be sure to add any attachments to your mixer before you plug
them in.
Step 1: Preheat & Prep
Preheat oven to 350°
Line baking sheet with parchment paper.
Place sesame seeds in a bowl.
Pour milk into another bowl.
Step 2: Cream
Add powdered sugar and shortening to stand mixer and beat with paddle attachment for 3-5 minutes.
Add vanilla and stir to combine.
Step 3: Eggs
Add eggs into the mixer one at a time, mixing completely between each addition.
Step 4: Dry Ingredients
Add flour, baking powder, and salt to a mixing bowl and whisk to combine.
Add dry ingredients to stand mixer gradually, as it continues to mix. The dough will start to stick to itself. If your dough is too dry, add a little milk.
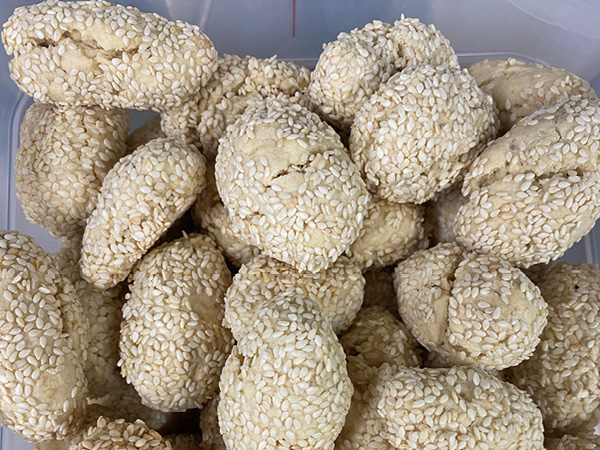
Step 5: Sesame Seeds
Use the cookie scoop to ensure each cookie is the same size. Once you have a dough ball, roll it into a nugget shape. Dip dough nugget into milk, then into the sesame seeds to fully coat the cookie. Line cookies on to the baking sheet.
Step 6: Bake & Enjoy!
Bake at 350° for 20 minutes. Check the bottoms to ensure they are golden brown. You may need to bake them for 5-10 more minutes depending on size.
Let cool for 5 minutes before serving.
Enjoy!!

by Maria Pericozzi | Jun 9, 2023
Kitchen Safety Tips:
Always use a pot holder!
Let people in your home know that you will be using the stove.
Use the claw method when using a knife to avoid any accidents.
Step 1: Prep
Measure and rinse your rice in mesh colander.
Prep your cutting station with a damp cloth and cutting board.
Chop green onions.
Cut chicken in chunks or strips, depending on your preference.
Step 2: Rice
Add rinsed rice and 4 cups of water to a small pot with lid.
Bring to a boil.
Reduce to low, keep lid on, and simmer for 20 minutes.
Step 3: Bread Chicken
Lay out your 3 bowls. Crack and whisk eggs in one. Put flour in another. Put the breadcrumbs or cornmeal in the third.
Bread chicken in the egg, then flour, and then breadcrumbs.
Step 4: Air Fry
Air fry chicken at 375° for 16 minutes or until the internal temperature of the chicken is 165![]()
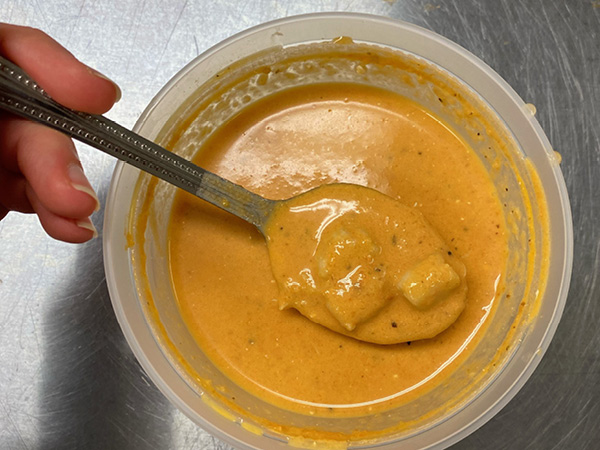
Step 5: Sauce
Whisk your cornstarch into the soy sauce. Then add all sauce ingredients to a deep pan over medium high heat. Continually whisk until the sauce boils. Let boil for about 3 minutes.
Toss cooked chicken in sauce to coat.
Step 6: Serve and Enjoy!
Plate with white rice, your saucy chicken, and top with chopped green onions & sesame seeds for a garnish.
Enjoy!
by Maria Pericozzi | Jun 9, 2023
Kitchen Safety Tips:
Make sure to use pot holder when touching pots on the.
Turn the stove off as soon as you are done using it.
Step 1: Prep
Prep your cutting station by laying a damp cloth down and placing your cutting board on top.
Chop carrots and celery. Dice onion. Rough chop seafood.
Melt butter in pot over medium heat.
Step 2: Sauté
Sauté onion, carrots, celery, and garlic in butter until tender. Add in bay leaf, oregano, salt, and pepper while cooking.
Once tender, add flour and stir for about 2 minutes.
Step 3: Boil & Simmer
Add in tomatoes and vegetable broth. Stir to combine.
Bring to a boil then reduce heat and simmer for 30 minutes.
Add sherry and cream cheese. Stir to combine and simmer for about 10 minutes.
Step 4: Blend
Remove bay leaf.
Blend soup until smooth using blender or immersion blender.
Step 5: Seafood
Return pot to stove on a low heat. Add seafood and simmer a few minutes until it is cooked.
Step 6: Finish & Enjoy!
Add parsley and/or more salt and pepper to taste.
Let cool, serve, and enjoy!
Soup can be stored in an airtight container for up to 5 days or frozen for later!

by Maria Pericozzi | Jun 9, 2023
Kitchen Safety Tips:
Use a cutting glove while using the knife and the cheese grater.
Make sure to notify anyone in your home that you will be using the stove/grill.
Step 1: Prep
Prep your cutting station with a damp cloth and cutting board.
With a knife, slice red onion. Mince Garlic. Finely chop fresh mint.
With the cheese grater, grate cucumber.
Step 2: Sauce
Measure and combine all sauce ingredients into a mixing bowl. Stir to combine.
Place in refrigerator until ready to use.
Step 3: Slaw
Measure and combine all slaw ingredients into a mixing bowl. Use tongs to mix.
Place in refrigerator until ready to use.
Step 4: Grill
Use a frying pan on the stove, or a grill outside to cook the sausages.
Internal Temps:
Chicken sausage=165°
Pork Sausage=145°
Warm pitas on the stove or grill.
Step 5: Assemble
Take your warm pita and spread the sauce onto it.
Place sausage on top.
Use tongs to top with slaw.
Step 6: Enjoy
Enjoy!
If saving for later, keep all ingredients separate. Store in an airtight container in the refrigerator for up to 4 days. Once ready to eat, rewarm pita and sausage and assemble.

by Maria Pericozzi | Jun 9, 2023
Kitchen Safety Tips:
Always check the oven before turning it on
Always use and oven mitt
Step 1: Preheat oven
Preheat oven to 425 degrees
Line baking sheet with parchment paper
Step 2: Season Veggies
Toss the turnips and squash with the oil, sage, and salt.
Mix to combine
Step 3: Bake
Spread veggies onto parchment lined baking sheet.
Bake for 20 minutes, stirring halfway through.
Step 4: Reduce heat
Reduce your ovens heat to 400 degrees
Bake another 10-20 minutes until veggies are caramelized, stirring hallway through
Step 5: Finish
Once veggies are done baking, brush with honey or agave, and serve with sunflower seeds scattered on top
Step 6: Enjoy!
Let cool for a few minutes
Enjoy your roasted turnips and squash!

by Maria Pericozzi | Jun 9, 2023
Kitchen Safety Tips:
Check inside your oven before turning it on to make sure it is empty.
Always use an oven mitt!
Step 1: Preheat & Prep
Preheat oven to 350°
Line baking sheet with parchment paper.
Combine all frosting ingredients into a mixing bowl and combine with a hand mixer. Scoop into piping bag.
Step 2: Dry Ingredients
Add flour, cocoa powder, baking powder, and salt to a mixing bowl and whisk to combine.
Set aside.
Step 3: Wet Ingredients
Cream butter and brown sugar together with a stand or hand mixer for 3 minutes.
Mix in egg and vanilla until combined.
Mix in buttermilk and red food coloring until combined.
Step 4: Combine & Bake
Slowly add dry ingredients into the wet ingredients. Beat to combine. Do not overmix.
Scoop batter into piping bag.
Pipe hearts onto parchment lined baking sheet & fill in.
Bake at 350° for 10 minutes.
Step 5: Assemble
After cake is baked, let cool for at least 10 minutes.
Flip hearts over so that the flat side is up. Pipe frosting onto one heart and complete the sandwich with a second cake heart on top.
Step 6: Finish & Enjoy!
Dip sides of frosting into sprinkles if you want and Enjoy!!
These can be stored in an airtight container for up to 5 days.

by Maria Pericozzi | Jun 9, 2023
Kitchen Safety Tips:
Always check the oven before turning on!
Always use oven mitts!
Step 1: Pre-heat/Prep
Preheat oven to 350°
Spray donut mold with nonstick cooking spray.
Step 2: Dry Ingredients
Measure dry ingredients (flour, salt, baking soda, sugar, cocoa powder) and whisk together in a mixing bowl.
Step 3: Wet Ingredients
Add buttermilk, vanilla, eggs, melted butter, and red food coloring to a separate mixing bowl. Whisk to combine.
Pour dry ingredients into the wet ingredients and stir with a spatula to combine. Fold in Oreos.
Step 4: Pipe & Bake
Add batter to piping bag. Pipe batter into donut molds.
Bake at 350° for 10 minutes or until a toothpick comes out clean.
Transfer to cooling rack to cool.
Step 5: Frosting
Add all frosting ingredients to a mixing bowl and beat with hand mixer.
Step 6: Finish and Enjoy!
Use either a piping bag or knife to frost donuts. Sprinkle Oreo pieces on top. Enjoy!
These should be stored in an airtight container in the fridge because of the cream cheese frosting.

by Maria Pericozzi | Jun 9, 2023
Kitchen Safety Tips:
Check inside your oven before turning it on to make sure it is empty.
Always use an oven mitt!
Step 1: Preheat & Prep
Preheat oven to 350°
Line baking sheet with parchment paper.
Pour powdered sugar into a small mixing bowl. Set aside.
Step 2: Dry Ingredients
Add flour, cocoa powder, baking powder, baking soda, and salt to a mixing bowl and whisk to combine.
Set aside.
Step 3: Butter & Sugar
To another mixing bowl, add regular sugar, brown sugar, and melted butter. Stir with spatula to combine.
Add eggs, milk, vanilla, and red food coloring. Stir to combine.
Step 4: Combine & Chill
Mix wet and dry ingredients together with a spatula until fully combined. You may have to use your hands to knead the dough a bit to get the right texture.
Set in the refrigerator for at least 30 minutes.
Step 5: Scoop & Roll
Using a cookie scoop, form dough into balls. Roll each dough ball in powdered sugar, then arrange on your parchment lined baking sheet.
Step 6: Bake & Enjoy!
Bake at 350° for 12-14 minutes.
Let cool for 10 minutes.
Enjoy!!
These can be stored in an airtight container for up to 5 days.
by Maria Pericozzi | Jun 9, 2023
Kitchen Safety Tips:
Check inside your oven before you preheat it.
Always use a pot holder or oven mitt!
Step 1: Prep
Preheat oven to 400°
Prep your cutting station by laying a damp cloth down and placing your cutting board on top.
Mince garlic, dice sweet onion and bell pepper.
Step 2: Mandolin
Place mandolin on a clean flat surface.
Use the mandolin to carefully slice the eggplant, zucchini, squash, and red onion to about 3mm thick.
Step 3: Sauce
In deep skillet over medium heat, sauté onion and pepper in olive oil until tender. Add garlic and cook until fragrant.
Add herbs and tomato sauce. Cook on medium/low heat stirring occasionally for 10 minutes.
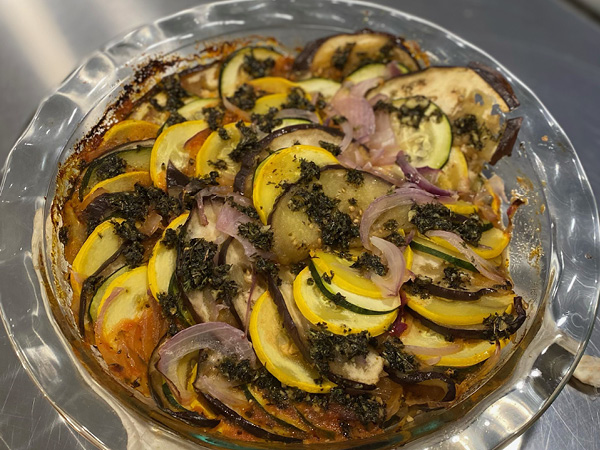
Step 4: Assemble
Pour sauce into the bottom of your circular oven safe dish. Spread evenly.
Arrange the thinly cut vegetables in a circular pattern starting on the outside, and spiraling into the middle.
Step 5: Herb Dressing
Combine all herb dressing ingredients together in a small bowl. Stir to combine. Spoon or drizzle the dressing over the entire dish.
Cover dish with aluminum foil.
Step 6: Bake and Enjoy
Bake at 400° for 40 minutes. Remove foil and bake for an additional 10-20 minutes or until veggies are tender.
Enjoy! This is best served with rice or bread.
Extras can be stored in an airtight container in the refrigerator for up to 4 days.
by Maria Pericozzi | Jun 8, 2023
Kitchen Safety Tips:
Always use an oven mitt!
Be sure to add any attachments to your mixer before you plug
them in.
Step 1: Preheat & Prep
Preheat oven to 375°
Line 8 x 8 baking pan with parchment paper and spray with nonstick cooking spray.
Step 2: Cookie Base
Add flour, salt, and sugar to a stand mixer or mixing bowl. Using the paddle attachment or hand mixer, beat to combine. Add butter 1 piece at a time and continue beating until a batter forms.
Set 1/3 cup batter aside.
Step 3: Bake & Filling
Press remaining batter down into the baking pan, being sure to fill the corners.
Bake at 375° for 15 minutes.
Combine raspberries, preserves, and lemon juice in a mixing bowl and stir to combine. Make sure to really mash the fresh raspberries to break them down.
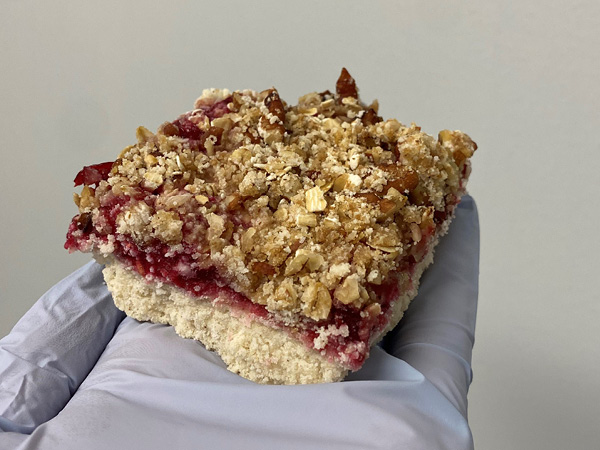
Step 4: Crumble & Assemble
Combine reserved cookie base, brown sugar, pecans, and oats to a mixing bowl and stir to combine.
Pour filling over hot cookie base and spread the crumble evenly over the filling.
Step 5: Bake
Once the filling and crumble have been evenly spread, the bars can go back in the oven at 375° for another 25 minutes.
Once done, remove from oven and let cool completely to set.
Step 6: Bake & Enjoy!
Once completely cooled, cut into bars.
Enjoy!!
Bars can be stored in an airtight container for 3-5 days.